Monday, January 25, 2010

Gels...

A gel is a transparent, coloured plastic material used in photography for altering or correcting the colour of light. Gels are inexpensive and durable and an absolute must in any photographer's kit.

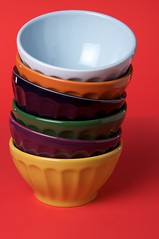
In my kit I have several gels. Red, blue, three shades of colour temperature orange (CTO) and green. The red and blue gels are for fun, the CTOs are for changing flash to match tungsten or adding warmth to skin tones and the green gel corrects for fluorescent lighting. You can typically find gels at your local photography store but any place that sells or rents movie studio or lighting equipment is likely to have some too. In Calgary I get them at a place called MTM Equipment Rentals where a one foot by two foot gel will run you $7 - cheap! That gives you an absolute ton of material for multiple flash heads.

Once you have the gel material you can cut it down to the size appropriate for your flash head. And to make attaching/detaching much easier and quicker, pick up some velcro tape. I prefer not to gum up my flash heads with velcro tape so instead I use the Honl speed strap. The speed strap provides the loop side of the velcro so I just apply the hook side of the velcro tape to the flash head and it is ready to go. I made up at least two sets of each colour.

If you are not a do-it-yourself kind of person you can always purchase gel correction and colour kits from Honl directly here. Of course Honl is not the only game in town but their speed straps and gels do work together nicely. I also have a Honl snoot and grid in my kit and although they are a bit pricey, they do work very well.

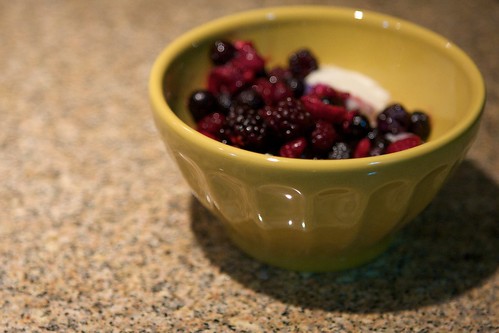
To give you an idea just how fantastic these gels are take a look at the photos below. The lighting is basically the same except in the first shot I turned off the background strobe. The background material was white seamless paper.

_MG_329321/365

On the second shot I used a "079 Just Blue" gel manufactured by Lee Filters. Big difference hey? Lee's website has a ton of product information and tools to help you find precisely what you need. And they have this nifty "swatch ball" where you can check out their vast selection of coloured gels.

One of the great things about coloured gels is that they can turn your plain white background in to any colour you want. It saves you having to buy a different colour for every occasion.

Not only are gels invaluable for colour correction they are a cheap and easy way to add a little fun to your photography.

Nice.

Wednesday, January 20, 2010

Cherry!

Man, oh man I am loving my new cherry seamless paper background!

_MG_3086 For this particular shot (at left) I used a Canon 580EX II flash shooting through an umbrella for my main light. This flash was set on manual and was set for f/8, around 1/8th power, I believe. To get that nice halo effect around my subject I used another 580EX II on the background but that was set up a bit different. To contain the light in a small circle I had a Honl 1/8" grid mounted on the flash. OK, $45 seems a bit pricey for a hunk of plastic but the thing works fantastic and it is quite well made, even though it is only a few cents worth of plastic. To attach it to the flash head you need a bit of velcro. You can either go to your neighbourhood hardware store and pick up a big roll of velcro or you can grab the fancy Honl speed strap to hold it in place. Either will do but I'm sure you can guess which option is the least expensive.

The spill from the main light illuminates the background well enough and the gridded background light creates the brighter halo effect around the subject. For this shot I wanted a bit more drama so I neglected to bounce light on the shadow side.

The next picture of the2/365 bowls is a bit of a different setup. This time there was a bare flash illuminating the background to keep it evenly lit. The bowls themselves are lit with a Canon 580EX II shooting through an umbrella, again manually set for about f/8.To minimize the shadows on the right side of the bowls a small piece of white foam core was used to push back a bit of light.

The final shot below I added a second light to the right of my subject for a bit of fill. The fill light was set about one and a half stops below the main light so it was around f/4.5. The fill light was also pushed through an umbrella. All the flashes were triggered with Pocketwizards. You can see a picture of the setup up shot here.

14/365

Oh yah, I am lovin' that cherry background.

Friday, January 8, 2010

Project 365!

I just decided today to do a "Project 365" for 2010. Yes, I know, I started a week late but I will either make up the 7 missed shots along the way or just run a week in to 2011.

"Project 365" is certainly not a unique idea. If you look on Flickr there are probably hundreds or thousands of people doing the same thing - all the time. The idea struck me today because I really had not been shooting a lot lately and I needed some kind of project to get back in the flow. It's not that I didn't want to shoot it is just with the holidays and other demands it had been difficult to get out there and make pictures. Project 365 is the antidote!

There are an absolute plethora of different ideas for a shot-a-day type projects. Some people choose to do a self-portrait, while others may shoot a specific location in their area for an entire year. Myself, I am just committing to making one picture a day for an entire year. I don't expect every picture to be a work of art and some may even be from my laptop or cell phone. It is really just about making pictures and that's it.

So, one down, three hundred and sixty-four to go.

_MG_2621